


I made these little owl ornaments over the holidays, but they are cute all year round!

I saw a photo of these somewhere online, but can't remember where?
Maybe Martha Stewart and/or Pinterest?
Anyway, I figured out how to make them from a photo, but
put my own little style to them.
SUPPLIES:

> 2 Fabric pieces over 5in. by 3 in. (contrasting colors/prints work best)
> Scissors
> Sewing Machine (or you can sew by hand of course)
> 2 Buttons (I like 2 different sizes)
> Yellow embroidery floss (for sewing beak)
> String (for hanging)
> Thread or embroidery floss (for sewing buttons and bottom)
> Poly-fil (stuffing)
> Pattern

Here is a scan of the pattern I drew.
It measures about 5 inches long and 3 inches wide.
You can vary your sizes by adjusting the pattern size.

With the right sides of the fabric facing eachother (inside),
cut out your pieces using pattern.

Sew along edges, sides and top, but leave the bottom open.

Now turn the fabric inside out.
*Poke corners and point with a pen/stick
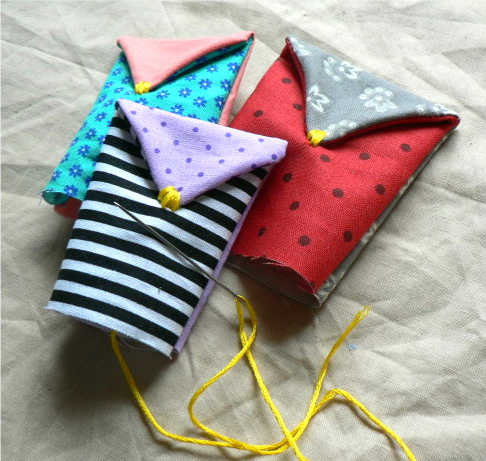
Now fold down the top point.
Use your yellow floss to stitch it down, which creates a "beak".
*Sew from the inside, not through the back.

Sew your button eyes on (this is where I switch the floss colors).
*Again, sew from the inside, being careful not to stitch the back to the front

Now thread and knot your string.
Sew through the top.

Bring string back through top.
Knot.
Now you have a loop to hang it with.
*Optional

Almost done!

Stuff 'em.

Thread that needle again (last time, I promise).
Fold in the bottom fabric and being to stitch a hem around the bottom.

When stitched all the way around the bottom,
pull the thread/floss tight (like a drawstring).
Knot it.
And there you have it...

Easy right?
Once you get the hang of it, these are pretty fun to whip up.
You can make them larger without a hang loop for a basic plushie.
Or a big pillow?
Adjusting the pattern can make them shorter and fatter too!
*I am not great at tutorials, so if you have any questions, ask away!
If you don't feel like making them yourself,
I can make some for you. Buy them here.
Thanks and Enjoy!
-melisa
i think this is a great tutorial. thanks for sharing!
ReplyDeleteThanks for checking it out Cherilyn! Miss you! -melisa
ReplyDelete