photo aboutus_zps72b4528a.jpg  photo fashion_zpsd5a79a41.jpg  photo handmade_zps6c44253c.jpg  photo recipes_zps2829987f.jpg  photo popculture_zpsc1606063.jpg  photo odds_zpsc2c2e360.jpg  photo links_zpsa73b8e77.jpg

Wednesday, February 29, 2012

February's Photographs


"Freelensing" with Jake.


My very first cinnamon rolls.


Had a couple fun little photo shoots with some of the
cutest kids ever!
Lovely zine from the sweet & talented Kelly Lanzendorfer!

My boys.
Snowy day projects.


Jake's gift to me on valentine's day! Made by our friend Bethany.


I hope you enjoy these little pieces of our life here in Pittsburgh! Looking forward to lovely spring weather and more outdoor photographs!
Happy leap day!

-sarah

Monday, February 27, 2012

I Have A Secret

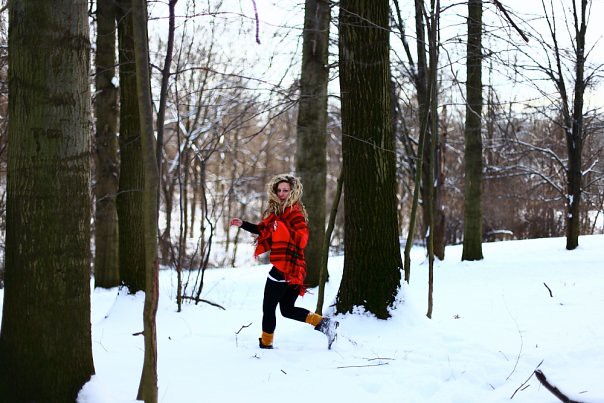
It is time we address one thing I have been hiding from everyone, except bff because she gets me. I have a secret obsession with ponchos and any wrap/blanket article of clothing. If I am at a store I always manage to wander over to them, longingly gaze at them, and then bid them adieu with sad eyes.

Luckily, one of the first photo shoots Mindi and I ever did involved a wrappy/poncho friend. I'm about to share it with you mainly so I can remind myself to wear it again!

Let me set the scene...it was frigid, Mindi's eyes kept watering, my fingers went numb, and my suede booties got ruined. So, it was perfect really.

Wrap: Forever 21
Yippe! 

This feels like it was forever ago. I will fight the cold once more as long as I have my trusty pal Poncho Wrap (I am pretty sure that is its government name).

What is one style/article of clothing that you secretly love?

-andrea

P.s. you have four more days to enter Melisa's giveaway on The Prairie Hen blog!

DIY Dog Bandanas (Scarves).

Today, I got to buy new fabric!
Going to the fabric store is one of my favorite things.
Having new fabric is very motivating for me to work on some projects.


Today, I thought I would show you how to make a super simple
bandana (or scarf) for your dog (or any pet I suppose).

What you need:
-Fabric           
-Pinking Shears
       -Needle and Thread 
      (or sewing machine)


To figure out what size you need, simply measure your dog's neck.
Half of the measurement will work for the actual bandana triangle.
You will need 2 fabric strips (like an inch wide) to add the rest of the length.
I would add extra length to make sure, then cut the excess.

Cut out your triangle with your pinking shears.
You can make a triangle pattern, or "eyeball it" like I do.
Once the top and one side is cut, you can fold it over and cut to make it even.


Now you will need those "ties" I mentioned before.

I use muslin, but you can use the same fabric as your bandana if you want.
All you need to do is cut, or rip 2 strips of fabric about an inch wide.
Again, measure and make sure they are long enough to fit around your dog's
neck and be able to tie.


Sew the ties onto the corners of the triangle.

And there you have it!
Now just wrangle your dog and force him and his friends to model them.

"Please just throw the toy!"

"Brownie" modeling his striped scarf.

"Tiger" modeling her pink scarf (which her huge tongue covers).

And my dog "Bruce Springsteen", who insisted on trying to bite it off
every time he realized it was on him.

Enjoy making your cheap, simple, bandanas!
If you make one, we would love to see your pets modeling them!

-melisa

P.S. Don't forget to enter to win one of my custom handmade items here...

Saturday, February 25, 2012

DIY Super Simple Curtains.

For months now I have been dying to get new curtains in our living room, the old ones were just too dark and bulky. I want to allow what little sunshine we have the chance to peak into our home, so this morning I made some quick little curtains that will do the job.

Supplies needed:
sewing machine
pins
scissors
measuring tape
2 pieces of fabric that measure 36x32 inches (I used to different patterns because I didn't have enough of just one but I really like how they turned out!)


Measure and fold approximately 2 inches at top so there is
enough space to fit your curtain rod through.


Pin and sew!


Hem other edges about 1/2 inch.


I am so ready for spring!
Oh hey! Don't forget to check out the Melisa's super cute giveaway on The Prairie Hen's blog!

Have a wonderful weekend!
-Sarah

Friday, February 24, 2012

Win an "oh melisa! " Custom item!

In the next few months, some of my favorite blogs are hosting
giveaways of any custom applique item from my etsy shop.


I will be doing one giveaway a month, so I will keep you posted on what blogs
to check out to find out how you can win!

Today is my first official giveaway.
"The Prairie Hen" has been so kind to host it!

Her blog is so sweet. She has great daily posts about being a mommy
(has an adorable little girl and a 2nd girl on the way),
thrift store finds, tutorials, and more!


She has been so sweet to work with!
I am so excited to share her blog with you!

So go check out her blog and read this to enter to win...

Tell your friends :)

And if you don't win this time, there will be more chances coming soon!

Thanks.
-melisa


Sunday, February 19, 2012

Caprese Pancetta Cupcakes

A savory cupcake can, and should be done. Bff, Mindi, told me about a serious need to make an Italian inspired cupcake idea over gchat one day, and with our kindred brain waves thinking about one topic terrific things happen...via Google Doc. We both earned all of our badges from Camp Good At Things, so...

Caprese Pancetta Cupcake..huzzah!!
I need a minute to admire the brain child of Mindi and myself. This is just one more affirmation that we need a bakery.

Caprese Pancetta Cupcakes- Recipe by Mindi and I
makes 2 dozen 
1 cup salted butter, at room temperature
1 3/4 cups sugar
4 eggs
3 cups all-purpose flour
2 tsp. baking powder
2 cups parmesan cheese
1/4 lb pancetta
1/8 tsp. fresh ground pepper
zest of a lemon
1 cup buttermilk
Preheat oven to 375 F and line 24 muffin tins with paper liners.
Bake pancetta on a cookie sheet until nice and crispy, about 20 minutes. Dab off grease, and break up into pieces.
In a large bowl, beat the butter, sugar and lemon zest with an electric mixer until fluffy. Add the eggs one at a time, beating after each addition. 
In a small bowl, stir together the flour, baking powder and pepper. Add to the butter mixture a third at a time, alternating half of the buttermilk in between the thirds. Beat until just combined. Fold in parmesan cheese and crumbled baked pancetta. Splash a little more buttermilk if it is too thick.
Fill the prepared tins and bake for 20-25 minutes, until springy to the touch and a tooth pick comes out clean.  Cool in the pan for 10 minutes on a wire rack, then cool for another 10 minutes out of the pan. 

Basil Marscapone Frosting
4 chopped fresh basil leaves 
9oz of marscapone cheese
8oz block of cream cheese
1/8 tsp fresh ground pepper
2 tsp of rice vinegar or balsamic vinegar, dashes of salt to taste
Mix well, and adjust to taste. The vinegar gives it that pizzazz it was lacking. Use whatever kind you have lying around. Garnish with a sliced cherry tomato and mozzarella ball through a toothpick and stick in top of the cupcake. We highly suggest sprinkling some more parm on top

Part savory meets sweet, part MAGIC!
Make sure to store these angels-in-tin in the refrigerator. The expletives that were coming out of our mouths after trying these are too risque for this blog. Swearing out of joy is better than crying in my book. Make 'em, eat 'em, then swear about 'em.

-andrea

Saturday, February 18, 2012

Shout Out to A New Blogger Friend...

In my search to start some ad sponsorships, I came across a blog that I just became obsessed with.
The blog is called "Run With Scissors".
It is full of daily life stuff, crafty stuff, and starting a family stuff.

It is by a lovely lady, Janel, 

who along with her husband,
have been working towards adopting a baby girl.
The adoption timeline is so precious to read.
And check out this nursery they have been working on...


Anyway, they finally got the call that a baby girl is on the way to them!

With that comes lots of fees, etc. and they need to raise the funds A.S.A.P.

We just wanted to give her a shout out and spread the word, hoping more friends
will donate or buy some of her amazing things in her etsy shop.

We wish Janel and her family the best and we are dying to see pics of Amelia!


-melisa and the gals

Friday, February 17, 2012

Oh Melisa - Cute Things on Cute Kids!

Us gals had quite an exciting day yesterday!

For years I have been making one of a kind applique children's clothing
and FINALLY put together a photo shoot with a few of
my very favorite kiddos.

Sadie (my niece/Danielle's daughter), Max (my good friend Danna's son),
Addison (Andrea's niece and my new BFF), 
and Josie (our pal Emily's new little girl - AKA: cutest baby ever).

All 4 of these children are under the age of 3.

Sarah took so many amazing photos!
Check out more of her photography here.


Here our a few of our favorites...

Josie.

Sadie Fay.

Max.

Addison.

Never would all 3 smile at the same time.

Hoodies & Cardigans too!

Friends!

Feather.

Moose.

Cake - Birthday Design.

Robot.

You can see more of my designs at www.ohmelisa.etsy.com.

And for your amusement, the classiest photo of all...


Thanks to my friends who let me borrow their cute kids.
Thanks to Sarah for taking the perfect photos.

-melisa