Here is a little tutorial on how to make
(my version) of fabric strawberries.
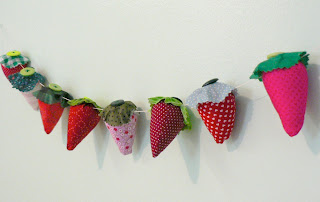
They can be used as bowl fillers, garland, etc.
*I realize some of these look like peppers,
that is what happens when I draw my own pattern!
I like to make adjustments as I go along.
Here is what you will need...
-Fabric (red & green) -Green Button(s)
-Scissors -Hot Glue Gun
-Thread (or floss) -Needle
-Poly-fil
-Sewing machine (or you can hand sew)
*Pinking Shears & String for garland are optional*
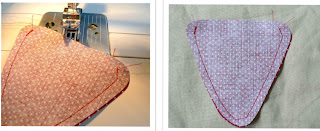
Put fabric pieces with inside facing out.
Cut out pattern.
Here is mine, but feel free to adjust if you want.
Sew around around the fabric, leaving top open (not sewn).
Turn your piece inside out and stuff it with some poly-fil.
Now, take you green piece of fabric and cut out a circle.
I used pinking shears, but you can just cut jagged edges.
Thread your needle and sew a gathering stitch
at the top of your strawberry. Pull it tight.
Without cutting the thread, sew through the green circle fabric,
sewing the button onto the middle.
Basically, you are sewing the green top onto the strawberry.
Once it has been secured tight, knot and cut.
Now, get that glue gun ready...
I randomly glued the green piece to the red strawberry
to hold down the top and make it look more "leaf-like".
There you have it!
Have fun mixing fabrics and buttons!
Don't forget, you can make this into a cute summer garland
by simply stringing these together with a needle and string.
Have any other ideas that you could use these for?
Let's hear 'em!
-melisa


No comments:
Post a Comment